June 30, 2022
UARM
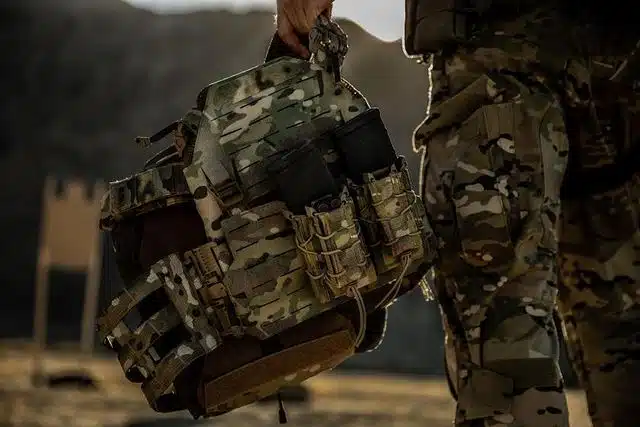
Modern body armor is quite grateful when it comes to installations, even if you are a beginner. If you are planning to use a plate carrier for the first time there are only a few common sense steps and a few tricks that you should know, everything else will be optional. The common sense parts of the plate setup are similar to what you need to do with all gear; measure your size and make sure you need the gear for your mission. This means that the materials and attachment standards need to be applicable to your situation. There are five aspects to consider when picking out the plate carrier to install:
  1. Type
  2. Size
  3. Weight
  4. Color
  5. Comfort
Unlike most gear where priorities go in descending order, with plate carriers all are important and your option should not fail or even be unsatisfactory in any of the aspects. Take your time and be slow with the measurements. Also, consider all of the possibilities where you might find yourself. Because of the new materials your PC can last for years and it would be a good idea to make a good pick. Finally, while most modern plate carriers are modular and allow for attachments, especially with MOLLE, there are still those who are not. If you need pouches and holsters on your plate carrier, make sure that they are available.

Measuring the Size

Although a lot of people are familiar with plate carriers from movies and TV shows, those usually don’t showcase the correct position of the plate carrier and thus force people to choose bigger models. Namely, the vest part of the plate carrier, the part where the plate setup will go, is slightly higher than what you would expect. It should go from the bottom of your collarbone to just above your belly button, but not covering it. For width, it should go from the middle of the pectoral muscle on one side to the middle of the pectoral on the other. Half an inch difference isn’t a problem, but you shouldn’t go more than that in either direction. Then there is the cummerbund, which should encircle your ribcage with the front and back vest. The cummerbund size should be exactly your ribcage circumference when in resting position. Not too tight and not too loose. You might imagine that you will want more protection and would opt for a bigger plate, but the only thing that will do is to prevent you to bend and move your arms freely. Correct size will always be the best and the safest size.

Preparing the Carrier

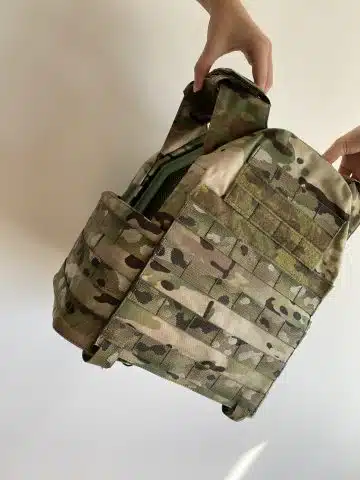
Once you have ordered and have in your hands the correct size plate carrier, you will want to prepare it. Make sure you have removed all of the packaging material if there was some and lay the PC on a flat surface. Then, attach the cummerbund in the back, adjusting the size to what you need. This part is usually very adjustable and you should tie the back in a shoelace pattern to ensure that it will move and flex with the body but not become lose. Going forward, attach any pouches and holsters that you would need. If attached with MOLLE, it will be much easier to do this now than when the plate setup is inside. Finally, go with your hand through the plate pocket and check if everything is smoothed out and that there aren’t any strings or debris that have found their way into the system.

Installing the Plates

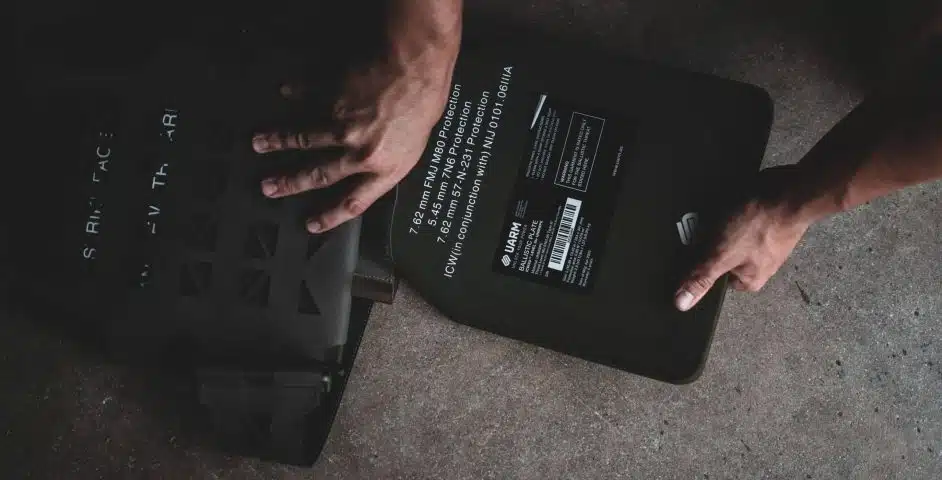
Quite ironically, this is the easiest part of the process of setting up plate carrier gear. Because the new systems are modular and predict separate transport for plate carriers, there will be a pocket where it fits and you just need to slide it in as far as possible. This will also inform you how to put on a plate carrier, because you will insert one in the front and in the back, and you will need to slide in and attach the cummerbund before you start. Once it is in, you will need to close the pocket. That is usually done with Velcro or by tying up straps. There are also top feeding plate carriers, but these are rare because they have issues staying tight at the top.

Securing the Insert

Before you test out how to put on a plate carrier, you will need to make sure that the insert is secured. Double-check the stability of the pocket and if the closing Velcro is in the right spot. The best way to do this is to shake the plate carrier with the insert inside for just a bit and see if the ballistic insert is moving with the carrier or if everything seems like one piece. If the latter is the case, you are ready to move forward.

Jump and Pull

This is a neat little trick when setting up a plate carrier system, because you can test if you have done everything correctly in a relatively small space and quickly. The plate carrier with plates should be balanced and weigh on both sides of your body equally, even with additional gear. Here you will also figure out how to put on a plate carrier as it is not identical to all other apparel. You don’t want to smack yourself in the ribs with the plates, so you need to pull up the plate carrier with the plates and slide laterally into it. Then, simply jump and you will figure out instantly if you are being pulled out of balance. If so, consider if you can make it right with small adjustments to the cummerbund or shoulder straps, or should you reconsider the positioning of the gear. Finally, pull the carrier away from yourself and wiggle around to see if any strap is loose and wrongfully connected. If you find any mistakes, take off the plate carrier setup and adjust it. Going back and forth between the middle three steps is normal and few people get it perfect on the first try.

Adjusting the Positioning

This is the final step and if you have an advanced plate carrier such as the FRPC Fast Response Plate Carrier the process will be very simple. Once you are sure everything is in place and that you can be balanced, you need to make sure that the plate is protecting the right place. In most cases you will need to bring the plate up a bit and shorten the shoulder straps. If you are uncomfortable to sit that would be a good indicator of this. Also, if the cummerbund is loose this is where you can tighten it, or loosen it if there is any discomfort. This will mark your plates as installed and you can go forward with the mission.

FAQ


How to Put On A Plate Carrier Vest?

To figure out how to put on a plate carrier you will need to first assemble everything you want to wear. Then pick it up and hold it up next to you, simply plunging in from the side as if it’s a led poncho. Make sure that the shoulder pads are in the right place and then connect the cummerbund to make the vest complete.  

How Are Plate Carriers Sized?

A plate carrier setup will somewhat mirror apparel sizes with Small, Medium, Large, and Extra Large. But, the sizes are not identical and in some cases you will need a different one. To make sure that the plate setup is true to size, consult the sizing chart that is on the website.  

How to go About Installing 10×12 Plates?

For UARM plates, the 10×12 plate will correspond with the Medium plate carrier. While the official size of UARM medium plates is 24×32 centimeters or 9.4″ x 12.5″, the material will stretch to accommodate the slightly wider plate. Everything else is the same.  

How to go About Installing 11”x14” Plates?

For UARM plate carriers, the 11×14 inch plates will correspond with the size Extra Large (XL). The width of modern plates is slightly less and the pocket is only 10.9”, but the material will stretch to accommodate the additional ¼ inch. Everything else is the same.

Related articles

Cart
Your cart is empty
Go shopping